
Original

Corrected
For Most Help, look in the status bar in the bottom of the program window for hints on what the tools do. Some features are described with examples in this page. It is a work in progress, and answers to questions I receive might be added.
Adaptive noise removal
Auto color correction
Fourier transformation
PNG versus GIF and JPEG
Red eye removal
Restoration by deconvolution
Texture synthesis
Please support Image Analyzer
You Must be ONLINE to use the support link
Auto color correction adjusts black/white point, gamma and saturation. This will improve
the contrast and enhance details in the image. Black/white point and gamma are adjusted in
the same way as when you press the Auto button in Color mapper.
The adjustment is based on an analysis of the image. By making a selection before clicking
Auto color correction you can tell the program to only analyze that part of the image.
You would probably want to do that when correcting a picture with e.g. a black background.
Original |
Corrected |
Make a selection around the red part and click Red eye removal (Alt-E). The selection does
not have to be very accurate, but making it too large might result in loss of color around the eye.

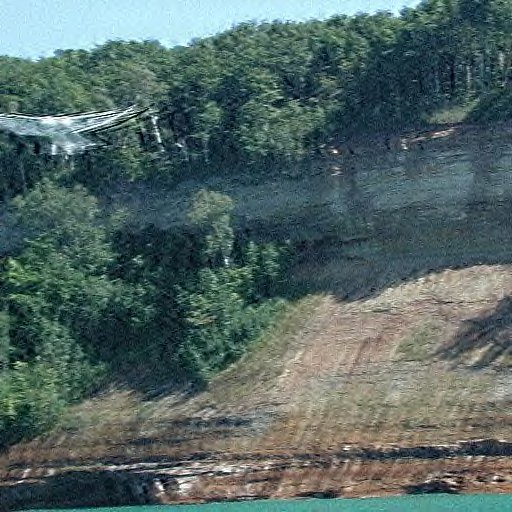
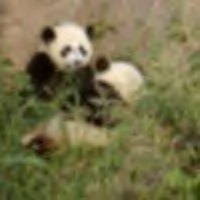
This feature will allow advanced reconstruction of blurred images. Both motion blur, out-of-focus
blur and other errors are handled. In the example below, the camera was moved what correspond to
about 17 pixels while the picture was taken. This distance can be estimated by looking at the details
in the background: A tree is approximately 17 pixels wide. Note that the bird is moving, and
therefore cannot be reconstructed using the same model as the background.
If the motion is neither horizontal nor vertical, the picture must be rotated before
deconvolution. This might, however, reduce the quality of the reconstruction somewhat.


Clip from original photograph from Ching-Kuang Shene
Restoration after 8 CGLS iterations.
For out-of-focus blur, the Circular blur model will probably give the best results.
The default setting will sharpen an image which is slightly unsharp. To find out which
radius gives the best result use the Test button. This will produce a number of
reconstructions with different filter radius. Enter an iteration count (~12), click Test,
enter the lower and upper bound for the radius and the number of reconstructions to generate.
If the result is too grainy then reduce the number of iterations.
 Original |
 Corrected, circular blur 12 iterations, radius=3.6 |
Adaptive noise removal (Alt-A) can remove high-frequency noise from most images.
Unlike the smoothing algorithm for noise reduction found in many image processing programs,
Adaptive noise removal works without unsharpening edges in the image.
Not only will noise reduction improve the visual impression of an image, it will also make
JPEG compression more effective producing smaller files with the same quality selection.
The example is the result of applying the filter to the deconvolution image
above using the default options.

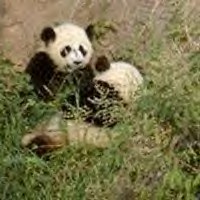
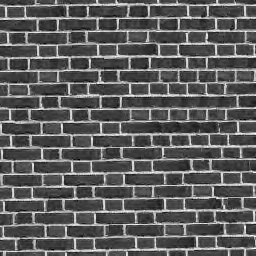
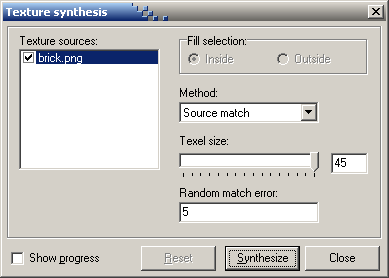
Texture synthesis (Special menu) is a tool for generating textures from a sample
or filling holes in an image.
Texture generation is performed by creating a blank image (File | New) and
opening one or more sample images and selecting them in the Texture sources box.
Destination mask tells the program what part of the image is known. In texture generation
we say that only the center pixel is known and all other pixels should be synthesized.
Method should be Source match and the Texel size the approximate size of the pattern
features. In the example below a large brick is about 45 pixels wide. If the random error is set
larger than 0, some more computation time is required but the program might be better at synthesizing
high-frequency elements.
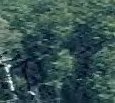
| Sample | Sample |
 |  |
| Synthesized texture | Synthesized texture |
 |  |
| Texture sample | Fixed image |
 |  |
I have been asked about saving the result of the Fourier transform and editing it in another program. It is simply not possible to save the result of a Fourier transform to a standard image file. A Fourier transform produces complex numbers whereas e.g. BMP files can only contain ordinary integer numbers in the range [0; 255]. If you want to edit the Fourier image and be able to do an inverse transform, you have to either use the editing function in Image Analyzer or edit the MAP file you get when saving the Fourier transform. In Image Analyzer you can use the eraser tool or make a selection and hit Ctrl-Delete to remove frequency components, or you can use the Frequency domain filter option in the Filters menu.
Why is there no GIF under File format options so that I can make transparent GIFs etc.?
Most people only use GIF because of ignorance. There is really no reason to use the old GIF format
anymore. Use PNG instead! All modern browsers and graphics programs support PNG, it has better
compression (produces smaller files) and it supports more color formats (e.g. 24 bit). The 256 x
256 grayscale image in the top of this page takes up 63 kb
as GIF and only 41 kb as PNG. This means 30% disk space saved and 30% less download time.
If using the lossy version of PNG the size reduction is even greater. With a quality setting of
-7 the PNG file size is 21 kb - only one third of the GIF file and without significant visual
quality loss. Lossy JPEG can produce even smaller files, and is in most cases better for
photographic images. But JPEG does not support transparency, and is not very good at compressing
images with sharp edges like diagrams and screenshots.
Note that the lossy PNG compression is not as effective with 256 color palette images as with
grayscale and 24 bit images.